Thursday, January 31, 2013

Fun Things for Kids to Do at Home during Winter Break

The Associated Press (Jennifer Forker) wrote an idea-inspiring article, Holiday Doldrums Can Spark Kids’ Creativity, which was syndicated in print and online throughout the United States in December 2012. The article featured crafting and storytelling project ideas from Show Me a Story author Emily K. Neuburger. The article was published during the holiday winter break.

We now have another winter break upon us and a potential for more bored kids. We decided to pull together a list of our own Storey-centric activities to get you and your little ones, crafting, storytelling (in a good way, of course!), exploring outside, and warmed up from the inside out.
Show Me a Story 
by Emily K. Neuburger 
Activities: Story-Disk Chain, Memory Cards, and Scribble & Tell
Download these three craft projects to spark children’s creativity, memory, and storytelling. Activities can be for a small or large group of children or can include the whole family in the participation!

Catch the Wind, Harness the Sun
by Michael J. Caduto 
Project: Solar Heat by the Gallon
A container of water that heats up in the sunlight during the day continues to give off that heat well into the night.
Download the PDF, and follow the steps to create your own small passive-capture solar heater.


The Nature Connection
by Clare Walker Leslie

Activity: Observing & Recording Nature
Scientists around the world are studying, testing, and observing many aspects of how our world’s climate and environment is changing. But what you may not know is that much knowledge comes from the careful observations of many other people as well. You, too, can be a part of this study.

To keep good scientific records or journals, naturalists use the same form to make sure that they don’t miss anything. Click here to download many different types of journal pages. You can use any or all of them, or make up your own style of study. A good entry includes information on when, where, what, and why. You can also include questions, drawings, and collected objects from your observations.
Tag, Toss & Run
by Paul Tukey and Victoria Rowell

Game: Dodgeball — Put a winter twist on one of the oldest games on the planet: play dodgeball in the snow. To further winterize the game, replace the rubber balls with snowballs!

Some consider dodgeball practically barbaric, as if launching a ball at another human being for the sake of pleasure has no place on the playground. We’re here to say, loudly, clearly, and respectfully, that dodgeball deserves a continued place among the cherished games of the past and future. Absolutely use the right kind of ball,* and realize that the game may need to be overseen by an adult — bullying should not be tolerated.

Download the official dodgeball rules, playground setup, and game variations here.


*If using snowballs, be sure that they are soft-packed and that they are not ice-balls!  
The Cleaner Plate Club
by Beth Bader & Ali Benjamin

Recipe: Have all these projects and activities made you hungry? Here is a kitchen activity with rewards — healthy and delicious Whole-Grain Chocolate Chunk Cookies to warm you up from the inside out!

This activity requires an adult — bake these for your kids or with your kids. 
Download the recipe.
Take your winter treat a step further and serve your cookies with Old-Fashion Stovetop Hot Cocoa made with real milk — a real Mom pleaser.

Have a safe and fun winter break!

Michael Caduto: Princess Firefly’s Lovers— A Traditional Tale from Japan

On a moonlit night during the seventh month, a breeze rocked the crimson petals of a lotus floating on the marsh. Cradled in this flower sat Hotaru, Princess of the Fireflies. Her golden light was a blazing star on a sky of dark water.

Up she flew among the lotus petals, past the wildflowers and out over the rice fields. Hotaru’s light worked its spell. Hundreds of suitors followed, struck by her beauty.

At last Princess Hotaru again came to rest on the petals of her lotus bloom.

Hundreds of suitors followed, struck by Hotaru’s beauty.

“Please,” cried each of the suitors who landed near Hotaru, “take me for your husband.”

“One alone shall win my heart,” she replied.

“What must we do?” they asked.

“You must bring me a gift of fire,” she declared. “Show me that you love me more than life itself.”

“This I will gladly do,” said Golden Beetle.

“I will not return without your gift of fire,” declared Hawkmoth.

“Neither of you can fly as swiftly as can I,” boasted Scarlet Dragonfly.

The three suitors flew off into the night. Scarlet Dragonfly saw a flickering flame where a young girl sat at her desk and read a love letter by candlelight. Her tears fell onto the parchment. Dragonfly flew bravely toward the flame to snatch a bit of fire for Hotaru. Instantly, his wings were singed.


Scarlet Dragonfly flew bravely toward the flame. 

“Oh, how sad!” cried the girl. “Why did you fly into the fire?” Scarlet Dragonfly lay lifeless upon the desktop.

Golden Beetle buzzed to a house where a woman sat mending clothes by the fireplace. Golden Beetle whirred past the woman’s left ear, causing her to jump. There was a crackling and a flash in the fireplace; then a puff of smoke drifted up with the sparks.

“What could that have been?” asked the woman.

She rose from her chair and found the toasted beetle upon the hot coals.

In time, Hawkmoth fluttered toward a house where a student was reading by the light of an oil lamp. Hawkmoth flew close to the flame, but the student brushed him away. Then Hawkmoth plunged into the candlelight and burned his wings. He fell into the thick lamp oil, struggled, and drowned.

Meanwhile, Hotaru waited safely within the petals of her lotus bloom. As she gazed at the stars, a golden light streaked across the sky. “It must be a falling star!” she thought. The light came closer until Hi-Maro, Prince of the Fireflies, perched upon a petal at the edge of Princess Hotaru’s lotus. Hi-Maro unfolded his wings to reveal the brilliant flame of life within. Hotaru leapt with joy at the sight.

“I have come to ask you to be my wife,” said Prince Hi-Maro. He flew up over the marsh, and his golden, dancing starlight captured Hotaru’s heart. The prince and princess were wed later that night. Generations of fireflies have lived amid the lotus petals ever since.

To this day, during the time of the seventh moon, Princess Hotaru’s suitors fly through the darkness on their quest for a gift of fire. One after another, they throw themselves into the flames: tall candles in Buddhist temples, lamps in the courtyards of shrines, kitchen lanterns, and sparks streaking from chimney tops. Each morning, people find the places of night fire littered with bodies. “Look,” they say, “many lovers tried to win the heart of Princess Firefly last night.”

• • • • • • • • • • • • • • • • • • • • • • • • • 

The story of Princess Firefly could be a symbol of our lives today. The firefly Princess Hotaru is like all those things that we want to fulfill our dreams of happiness. Energy-consuming toys, gadgets, tools, and appliances are our Princess Hotarus — those things that we could not make or use without the gift of fire — the energy supplies that generate the power to produce and run our devices.

So, like Golden Beetle, Hawkmoth, and Scarlet Dragonfly, we spend our time seeking the flames. It takes more then 6,000 electrical power plants, running 24 hours a day, to satisfy the need for electricity in the United States. In our hunger for more and more energy to power a way of life that we find so attractive, we throw ourselves into the flames — often making unwise decisions by wasting energy and using sources of energy that harm Earth and each other.

No wonder Princess Hotaru chooses Prince Hi-Maro, who is also a firefly. About 90 percent of a firefly’s energy is used to make light. Our common incandescent lightbulbs, however, waste 90 percent of the energy they use by producing heat instead of light. The most energy-efficient lights that we can now obtain, which are called light-emitting diodes, or LEDs, convert nearly 80 percent of the energy they use into pure light! If using incandescent bulbs and other devices that consume a lot of energy is acting like the fire-seeking bugs in this story, then using energy-efficient lights is like finding our true Princess Hotarus and Prince Hi-Maros.

Learn more about energy-efficient lighting in Michael’s post, Don’t Be an Energy Hog, Replace Your Bulbs!

The story “Princess Firefly’s Lovers” (above) was excerpted with permission from Catch the Wind, Harness the Sun: 22 Super-Charged Science Projects for Kids © 2011 by Michael J. Caduto. Illustrations by © Clayton Hanmer. All rights reserved.


Author Michael J. Caduto is the creator and coauthor of the international best-selling Keepers of the Earth series and Native American Gardening. He also wrote Earth Tales from Around the World, Pond and Brook, Riparia’s River, and many other books on the power of nature. His awards include the Aesop Prize, the NAPPA Gold Award, the Storytelling World Award, and the American Library Association’s “Best Book for Young Adults.” Michael lives in Vermont. Visit him at www.p-e-a-c-e.net.

Wednesday, January 30, 2013

Who Were the Inventors of Electric Light?

A: Humphry Davy, Sir Joseph Wilson Swan, Thomas Alva Edison, William David Coolidge, Oleg Vladimirovich Losev, and Ed Hammer have all earned their place in history as the inventors of electric light.

The first electric light — called an electric arc — was made in 1800 by Humphry Davy, an English scientist. In 1878, the English physicist Sir Joseph Wilson Swan demonstrated new electric lamps in Newcastle, England. Then in 1879, after experimenting with thousands of different filaments, American inventor Thomas Alva Edison created an oxygen-free bulb that glowed for up to 40 hours, and he eventually produced a bulb that could glow for over 1500 hours. William David Coolidge invented the incandescent bulb in 1910 — the bulb that revolutionized the world. Russian scientist Oleg Vladimirovich Losev invented LED lighting technology in the mid-1920s, though he was not credited for his invention until well after his death. Last, but not least, Ed Hammer (employed at the time by General Electric) invented the first compact fluorescent bulb (CFL) in the 1970s.

Information Sources: enchantedlearning.com, newscientist.com, and cnet.com

——————————————————

Did You Know?

Thomas Edison was an advocate for renewable energy.
“We are like tenant farmers chopping down the fence around our house for fuel when we should be using Nature’s inexhaustible sources of energy — sun, wind, and tide. . . . I’d put my money on the sun and solar energy. What a source of power! I hope we don’t have to wait until oil and coal run out before we tackle that.”   
— Thomas Edison, inventor (1847–1931)

Andrea Chesman: Kale All Day, Every Day

Call me Kale Woman. I just love the stuff. I love the way it grows tall, allowing the grower to snap off the lower leaves as it continues to grow taller and put out more leaves (just don’t cut off the tip of the plant). I love the way it is hardy up to 10°F in the garden — even under a layer of snow. I love the way it has all these healthful properties (high in vitamins A and D, calcium, and fiber). I love the way it is so versatile in the kitchen, lending itself to steaming, sautรฉing, and stir-frying. But most of all, I love the way it tastes — so green and just slightly bitter.

Andrea Chesman, the self-proclaimed “Kale Woman”

So whenever someone approaches me about a cooking class, I suggest a class on cooking with kale. Which is what I found myself doing this past Wednesday for City Market Co-op in Burlington, Vermont. The class was held in the kitchen of Sustainability Academy, an elementary school in the Old North End. I’ve taught cooking classes there before — it always feeds my fantasy of becoming a school lunch lady.

The class was titled "Kale Three Ways," and the students were both kale lovers and kale virgins. All were aware that kale is very good for you and available from local growers through much of the winter. And although the class was promised three dishes, we actually prepared four.

Chopping red kale

We worked with curly kale, lacinato kale, and red kale — and I assured them there was no difference in flavor or texture once the kale was cooked. First, we started a minestrone soup that featured kale; then we roasted some; then we massaged some kale with a soy vinaigrette until it was tender enough to be enjoyed raw; then I sautรฉed some with garlic.

Chopping the garlic that will be sautรฉed with the curly kale

The point of sautรฉing the kale was to go over a few salient points. First, in my opinion, everything tastes better with garlic (and a little salt). Second, the skillet was preheated with olive oil until it shimmered, which is how we knew it was hot enough. Third, the kale was added in batches; as the first batch wilted, the second batch was added, and so on, until all fit in the pan. Then I sautรฉed the kale for about 8 minutes, until it was tender.

Finally, I encouraged everyone to drizzle a little extra flavoring onto the finished kale: balsamic glaze (available in supermarkets), pomegranate molasses (ditto), or a little soy sauce and sesame oil. As I wrote in a March 2012 entry about cooking winter greens, Chinese black vinegar also makes a tasty drizzle.

Here’s the recipe for roasted kale. This is a pretty foolproof recipe, unless you are the type to get easily distracted. If kids are underfoot, and you don’t have a working timer, roast the kale at 250°F for 20 to 25 minutes, instead of roasting at 450°F for 10 minutes. The color of the chips will be brighter and the flavor and texture will be just as wonderful.

Crispy Kale Chips 

Serves 1 to 4

Potato chips: be gone! Roasted kale is so delicious, you never need to turn to them again for a hit of crisp and salt. Like potato chips or popcorn, this is more appropriate as a snack or hors d’oeuvre than a side dish because of the high volume of the pieces. 

Ingredients
  • 1 bunch curly kale, leaves chopped in 1-inch pieces and tough stems discarded 
  • About 2 tablespoons extra-virgin olive oil 
  • Coarse sea salt or kosher salt 

Directions
  1. Preheat the oven to 425°F. 
  2. Measure the kale, and transfer to a large bowl. For every 4 cups of firmly packed leaves, add 1 tablespoon oil. Mix well with your hands to make sure the leaves are evenly coated. Spread out on a large sheet pan into a single layer. 
  3. Roast for about 10 minutes, until the curly tips of the leaves are darkened and the interior of the leaves are a bright green. The leaves should be mostly crunchy but not blackened. 
  4. Toss with salt, and serve. 

Recipe adapted from Recipes from the Root Cellar. © 2010 Andrea Chesman. All rights reserved. 

Visit Andrea’s website

Tuesday, January 29, 2013

Michael Caduto: Don’t Be an Energy Hog, Replace Your Bulbs!

Replace incandescent bulbs and reduce greenhouse gases.
Incandescent lightbulbs may be small and
familiar, but they are big energy hogs!

Did you know that if you unscrew one incandescent lightbulb and replace it with an energy-efficient bulb, you are taking a small but important step toward reducing the destructive greenhouse effect that is driving global warming? When we lower our use of electricity, we cut down on the release of greenhouse gases from the power plants that create electricity. The electricity saved by changing a single old-fashioned bulb to an energy-saving compact fluorescent light bulb (CFL) will, during the life of that bulb, reduce the amount of carbon dioxide that would have been created to make that electricity by 1,000 pounds (454 kg). And LED (“light-emitting diode”) lightbulbs are even more energy efficient than CFLs — using 85 percent less electricity than incandescents.


These energy savings quickly add up. For every 45 incandescent lightbulbs that are replaced with energy-efficient bulbs, more than enough energy is saved to supply all the lighting for an entire household!

Keep it clean: CFL lightbulbs are now the cheapest and most commonly used energy-efficient lightbulbs, but each bulb contains a small amount of toxic mercury. These bulbs must be handled with care and cleaned up properly if broken, and they cannot be thrown away when they blow out. Ask at your local hardware store about how to properly recycle used CFLs. Visit the following page on the U.S. Environmental Protection Agency’s website for details: http://www.epa.gov/cfl/.

Excerpted with permission from Catch the Wind, Harness the Sun: 22 Super-Charged Science Projects for Kids ©2011 by Michael J. Caduto. Illustration by © Clayton Hanmer. Photographs by © Greg Nesbit Photography. All rights reserved.

Author Michael J. Caduto is the creator and coauthor of the international best-selling Keepers of the Earth series and Native American Gardening. He also wrote Earth Tales from Around the World, Pond and Brook, Riparia’s River, and many other books on the power of nature. His awards include the Aesop Prize, the NAPPA Gold Award, the Storytelling World Award, and the American Library Association’s “Best Book for Young Adults.” Michael lives in Vermont. Visit him at www.p-e-a-c-e.net.

Monday, January 28, 2013

Amy Cotler: A Walk on the Wild (and cultivated) Side . . .

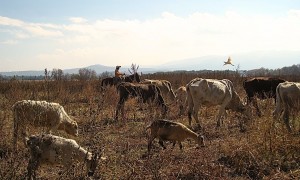
See the cowboy in the distance?
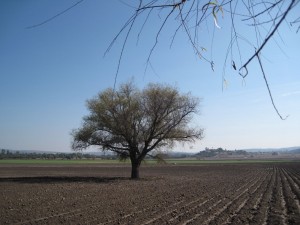
A walk around the lake in San Miguel, Mexico took us past a local farmer, tending his diverse livestock — sheep, goats and cows.

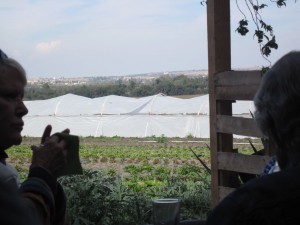
This was my 3rd visit to the organic farm, La Trinidad, over several years. The first time I visited, we dug a variety of fresh greens out of giant vats of cold water to take home. On the second visit, they’d added a sweet store. Now, there’s a restaurant where you can eat overlooking the field you see in the picture above. (For more, scan down on this link.)

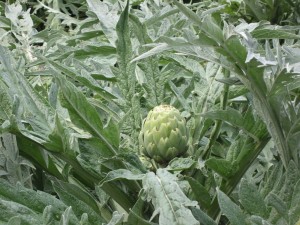
This artichoke looked especially tasty after hearing that they just got a foot of snow back home.
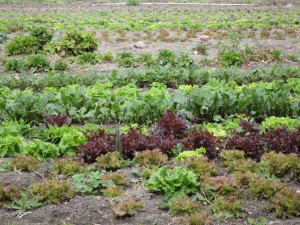
Gorgeous field. The downside? Most of the yield from the conventional farms here is shipped to the US, including lots of broccoli, which uses plenty of chemicals and, of course, water, a scarce resource here.
Standing in front of well irrigated field in an arid climate during the dry season.


Amy Cotler is author of  The Locavore Way © 2009 
This has been reposted from Amy's blog.

Karyn Siegel-Maier: Clean Your Laundry — Naturally!

Good news: There are more natural cleaning products available today than ever before.

Ready for the bad news? Not all “natural” cleaning products are, in fact, all natural. Without regulation to define such terms or to disclose ingredients, a new marketing trend known as “greenwashing” has emerged. This means that a “natural” laundry product may actually contain a heavy chemical load, but the fact is watered down by the promise of (synthetic) lavender freshness on the label.

Fortunately, dirt hasn’t changed much over time and still responds to that tried and true remedy: soap + water. This basic formula is enhanced with the inclusion of pure botanical essential oils and vinegar to sanitize, soften, and scent clothes and linens — naturally.

Play it safe, and make your own natural laundry detergent.

Basic Laundry Liquid Formula

Dr. Bronner’s, one of the most popular liquid castile soaps, is available in a variety of scents today, if you wish to skip adding your own essential oils.
2¼ cups liquid castile soap
¼ cup white distilled vinegar
1 tablespoon glycerin
¾ cup water
10–15 drops essential oil of your choice
Combine all ingredients into a plastic container or squirt bottle. Shake once or twice before adding to the wash. To use, add ¼ cup per average load, ½ cup for extra large or heavily soiled loads.


Illustration by © Kim Rosen

Basic Laundry Soap Powder

This recipe will wash six average loads, but you can easily double it.
1 cup washing soda
1 cup scented baking soda (see essential oil chart below for selection)
1 cup soap flakes or finely grated pure bar soap
Combine all ingredients and store in a heavy plastic container. Use ½ cup for an average laundry load.


All of these essential oils help clean and freshen the
laundry. They offer other benefits as well.

Recipes, illustration, and chart excerpted from The Naturally Clean Home © 2008 Karyn Siegel-Maier. All rights reserved.

Friday, January 25, 2013

Merrily We Sew Along: Episode Three — Are You Up for the Challenge?

merrily we sew along

There is an Improv Sewing sew along going on, hosted by the blogs imagine gnats, casa crafty, and the authors of Improv SewingNicole Blum and Debra Immergut. As part of this month’s sew along, Storey has donated 5 books to the prize package. If you’re looking for something to do, sew along with us — it’s kind of fun!

Episode Three: Canvas Nesting Baskets
is sponsored by the very wonderful Aurifil Thread and Storey Publishing!


The winner of the Merrily We Sew Along: Episode Three challenge will receive a Folk Art Aurifil 12wt wool 12 spool large collection case, as well as a package of these five sewing books from Storey Publishing: Improv Sewing, Fabric-by-Fabric One-Yard Wonders, Mend It Better, Grow Your Handmade Busniess, and Sew Up a Home Makeover. How great is that?

Click here to get the basics of how Merrily We Sew Along works.

Check out this recent post on this month’s project — canvas nesting boxes.

Improv Sewing authors, Nicole Blum (left) and Debra Immergut (right).


Thursday, January 24, 2013

Making the Most of a Bear Situation

Jackson Landers, The Locavore Hunter and author of The Beginner’s Guide to Hunting Deer for Food and Eating Aliens, recently happened upon a car accident involving a bear. He made the most of a bad situation.

 Jackson Landers, The Locavore Hunter

Jackson wrote about the incident for Slate in the online article, Unbearably Delicious — a great story and an interesting read. Later, he followed up with a similar article, Bear Meat: The Rest of the Story, on his own blog, which included additional details.

Hunters, animal lovers, and just about everyone else will enjoy Jackson’s opportunistic adventure — take a few minutes and give his articles a read!

Learn more from Jackson about eating and hunting local.

Wednesday, January 23, 2013

Heather Smith Thomas: Notes from Sky Range Ranch – Winter Babies

Our son Michael has been working in North Dakota since the end of October, driving trucks, trying to make a little extra money to help make their bank payments this winter, so my husband Lynn and I have been helping our daughter-in-law Carolyn feed their cattle while he’s gone. Michael was home for a few days at Christmastime and showed them how to run his big bale processor that chops up the hay — making coarse hay more palatable and putting it in a windrow for the cows to eat.


Feeding cows with bale processor

On Friday, January 8, it was Lynn’s turn to feed with the processor, since Carolyn had to work at the local vet clinic. When he drove out to the field, he saw a newborn calf following its mama (an old cow, number 206) to the feed ground. It’s been awhile since we’ve had new babies in January! Lynn and I calved our cows in January for more than 30 years, to have the cows all bred again in April before they went to summer range in May. That way they could be bred to our own bulls, with selected mating for each cow. We could use easy-calving bulls for the heifers and make sure we didn’t breed a cow to her own sire; we also didn’t have to worry about breeding-transmitted diseases such as vibrio or trichomoniasis that might be spread by neighbors’ bulls. On our rugged big-range pastures, breeding on the range is always challenging because cattle are widely spread and the bulls don’t always find them at the proper time, resulting in a longer, strung-out calving season. Our fertile crossbred cows always bred in about 30 days, here on our home pastures.

Calving in January, we rarely lost any calves at birth in our 180-cow herd. During cold weather we put the cows in the barn when they went into labor, and we were there for every birth — able to correct any problems. The young calves rarely got sick with scours because our fields and pastures were frozen and clean rather than muddy or sloppy with manure.

 Calves playing in snow

Winter calves

Calving in late April or May when weather is warmer, with green grass, wasn’t an option back then, unless the cows calved out on the range, more at risk from predators. They had to go to summer range so we could put up hay on our fields at home.

Cattle on summer range

After we sold most of our cows to Michael and Carolyn, when they were running several leased ranches, we didn’t need to put up as much hay for our smaller herd, and we could keep our cows home during summer. At that point we changed to calving in April and May.

Michael and Carolyn quit leasing the extra ranches a few years ago, however, when rent costs went too high. They sold most of their cows to pay off some bank loans. Last summer they bought some pairs and pregnant cows to run on our upper place and essentially start over again.

Most of the cows Michael and Carolyn bought last summer had very young calves at side or were ready to calve, but three of those cows had large calves and might have been bred before they were sold. When our vet preg checked them a few weeks ago, he said one old cow, number 206, would probably calve in January but the other two wouldn’t calve until April. We weren’t too eager to have a January baby because these purchased cows had an unknown handling history. Some are aggressive mothers that attack anyone who comes close. We didn’t want to have to try to put one in the barn.

It was cold (12 degrees) and windy the night old 206 calved, but she probably calved in the brush where the cows have been bedding. The new calf was dry and had nursed and seemed okay. The next morning it was 15 below zero, and we were glad that old 206 had calved the night before, when it was warmer. Her baby, a feisty heifer calf, was managing fine, with the windbreak shelter of thick brush.

It was cold again on Sunday, and when Lynn and Carolyn fed the cows, they discovered another newborn calf — from one of the cows the vet thought would calve in April. The calf was cold but had nursed at least one teat. It seemed okay the next day, but when our daughter Andrea and Carolyn fed the cows on Tuesday, they thought the calf was dead. It was lying on the old feed trail, on its back and stuck between two big frozen manure piles.

The calf raised its head when they approached with the tractor and processor, however, so they jumped out, with an ax handle for a weapon in case the mother cow was aggressive, and grabbed the calf. It was a big calf, weighing about 90 pounds, and it was all Andrea could lift. She handed the calf to Carolyn and climbed up into the tractor, grabbing the front legs of the calf to pull on as Carolyn handed it up and pushed on the back end. They got it into the cab, and it rode around with them to finish feeding, which was a challenge with not much room in the tractor, then brought it to the house.

We spent the rest of the day trying to thaw out that calf. It must have been stuck on its back, unable to get up, for quite a while. Perhaps a cow knocked it down or rooted it out of the way while eating hay, rolling it onto its back between the frozen manure piles. Her feet were stiff and cold. Her body temperature was below 80 degrees because it didn’t register on my thermometer. We lay her on blankets by the woodstove with a hot pad under her, using warm water on her cold stiff feet.


Andrea and Carolyn thawing out the calf

I injected dextrose under her skin in several places, and after we started warming her, we gave her 1½ quarts of warm water with powdered colostrum mixed into it, by stomach tube. We use a nasogastric tube (into the nostril, to the back of the throat, down the esophagus and into the stomach). We thought the colostrum product might provide more energy than regular milk replacer. The calf apparently hadn’t nursed for a while; she was dehydrated and didn’t urinate until evening, when we gave her another quart and a half of colostrum mix by tube.


Carolyn and Lynn feeding the calf with a nasogastric tube

By that time her temperature was finally rising, up to 95 degrees at 4 p.m. and 99 degrees by 6 p.m. Normal for a calf is 101.5 degrees. She was finally strong enough to stand. Lynn and Carolyn took the calf up to Carolyn’s basement, to a makeshift corral of furniture near the woodstove. Carolyn fed it a bottle at 2 a.m. and again at 8 a.m., and the calf nursed eagerly. She stayed home from work the next day, and after she and Andrea fed the cows, they brought the calf back down and put it back out with its mother.

The cow was confused, perhaps because the calf smelled different with all our handling. She started kicking the calf when it tried to nurse, so Andrea and Carolyn herded the pair to the barnyard. The cow tried to run off a couple of times, but Carolyn kept bringing the calf and Andrea kept herding the cow. Once we got the pair into the corral, the cow let the calf nurse, and we could see that part of the problem was a very sore hind teat — the tip was raw from frostbite.

So we put the pair into a small pen by our barn where we can monitor them. We shoveled snow away and bedded it with hay. The old cow is pretty smart and acts as though she’s been handled on foot before; she’s not as wild as some of the other cows they bought last summer and made herself at home in the pen, grateful for the extra hay and water. She acts as if she’s been in a small pen before. Andrea and Carolyn carried her some alfalfa hay, and the next time they went back to check on her, she looked at them, then sniffed the ground, expecting them to feed her some more! She’s an old cow, without much milk, but we can pamper her while she’s here by herself — and the calf will probably do okay. She’s letting the calf nurse three teats, and probably after awhile, the sore one will heal.

When we checked on the pair at dark, the baby was tucked in the hay between Mama and the plywood windbreak. The next morning the calf was cold (since the outdoor temperature was 12 below zero) but nursing, so it looks like this will work, and we won’t have to raise it on a bottle.

Heather Smith Thomas raises horses and cattle on her family ranch in Salmon, Idaho. She writes for numerous horse magazines and is the author of several books on horses and cattle farming, including Storey’s Guide to Raising HorsesStorey's Guide to Training HorsesStable SmartsThe Horse Conformation HandbookYour CalfGetting Started with Beef and Dairy CattleStorey's Guide to Raising Beef CattleEssential Guide to Calving, and The Cattle Health Handbook.

Wednesday, January 16, 2013

Andrea Chesman: Apple Pie


I saw some strawberries in the supermarket yesterday. Strawberries in January! I didn’t stop to look at the labels to see where they came from: not near Vermont, that’s for sure.

Okay, I will admit to the occasional Valentine’s Day splurge for strawberries from Texas or California. But early January? Who needs them?

What we need — all we need — when the sweet tooth beckons is apple: apple eaten out of the hand, in a cake, in a tart, and most certainly in an apple pie. There is nothing more satisfying than apple pie, whether it is served hot from the oven with coffee in the gloom of a wintry afternoon, reheated gently and topped with ice cream for an indulgent dessert, or eaten without apology for breakfast.

Early New Englanders ate apple pie daily, and by the 1830s apple orchards were considered as standard a feature on the average farm as a flock of chickens. New Englanders consumed prodigious amounts of apples in the form of apple cider and applejack. Fresh, unpasteurized apple cider naturally ferments into hard apple cider; if it's allowed to freeze, the water separates from the cider, resulting in a more concentrated, alcoholic drink, or applejack.

I digress. Apples are almost always available: fresh and local. Over 1,000 varieties of apples have been developed in the United States, though only about 250 varieties can be found in commercial heirloom orchards these days. Before refrigeration was developed, before railroads and roads crisscrossed the United States, before supermarkets eliminated regional favorites in favor of uniform, ship-anywhere varieties, New Englanders planted varieties of apples that produced apples from late summer through late fall, with the late-fall varieties good for keeping in root cellars and springhouses — some, such as the Northern Spy, especially good for pies.

I make pie whenever the apples I have bought seem to be languishing in the refrigerator. McIntosh, Gala, Jonathan, Golden Delicious, Northern Spy, Maiden’s Blush. Cortland, Granny Smith, Honeygold, Pink Lady, Rome. It is all good in a pie.

Apple Pie

Serves 8

Use 4 pounds of apples so you can mound the apples generously in the pan. This recipe makes an absolutely basic, absolutely perfect, all-American pie.

Ingredients
Pastry for a 9-inch double-crust pie, homemade or store-bought
¾ cup plus 1 tablespoon sugar, or more to taste
2 tablespoons unbleached all-purpose flour
1½ teaspoons ground cinnamon
¼ teaspoon ground allspice
¼ teaspoon freshly grated nutmeg
3½ to 4 pounds tart, crisp apples, peeled, cored, sliced ¼-inch thick (8 cups)
1 teaspoon finely grated lemon zest
1 tablespoon freshly squeezed lemon juice
2 tablespoons butter, cut into small pieces
1 teaspoon milk
Cheddar cheese or vanilla ice cream, to serve
Directions
  1. If you are making your own pastry, prepare the pie dough and refrigerate.
  2. In a large bowl, combine ¾ cup of the sugar, the flour, cinnamon, allspice, and nutmeg. Add the apples; sprinkle with the lemon zest and lemon juice. Toss together to mix thoroughly. If the apples are too tart, add a little extra sugar.
  3. Preheat the oven to 425°F with a rack in the lower third of the oven.
  4. To prepare the pie shell, lightly flour a work surface. Roll out the larger portion of the chilled dough to a thickness of about 1/8 inch. Fit into a 9-inch pie plate, leaving a 1-inch overhang. (Fit purchased pastry into the pie pan.) Spoon the apple mixture into the pastry, mounding it higher in the center. Dot with butter. Roll out the remaining dough into a circle about 1 inch larger than the pie plate. Moisten the edge of the bottom crust with water. Fold the dough circle in half, lift off the work surface, place the pastry across the center of the filled pie, and unfold. Trim the edge ½ inch larger than the pie plate and tuck the overhang under the edge of the bottom crust. Crimp the edges with a fork or make a fluted pattern with your fingers. Make several decorative slits in the top crust to allow steam to escape. Place the pie on a baking sheet to catch any juices that overflow.
  5. Bake the pie in the lower third of the oven for 20 minutes. Reduce the heat to 350°F and continue to bake for 30 minutes. Brush the top of the pie with the milk and sprinkle with the remaining 1 tablespoon of sugar. Bake for 10 to 15 minutes longer, until the crust is golden and the juices are bubbly.
  6. Cool the pie on a rack. Serve warm or at room temperature with slices of cheddar cheese or vanilla ice cream.
Recipe adapted from 250 Treasured Country Desserts ©2009 by Andrea Chesman and Fran Raboff. All rights reserved.

Visit Andrea’s website

Monday, January 14, 2013

“The Best Knitting eBook”

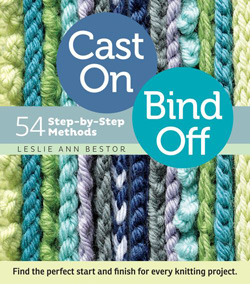
Cast On, Bind Off eBook (the Inkling version) was reviewed and loved by Knitty in their winter 2013 issue.

Here is the full excerpt of the review from Knitty.com:
image
Buy now from Inkling
Cast On Bind Off ebook
by Leslie Ann Bestor
Inkling
$12.99 for the whole book, $1.99 per chapter

This is the best knitting ebook from a print book that I’ve used. Granted, I have only seen and used one of their titles, bit Inkling seems to get ebooks for crafters better than most.

The interface is intuitive and easy to use, even though I am not much of a tech person and frequently get lost in ebooks.

There is the ability to jump around, which I love. All of the cast ons and bind offs are hot linked for step by step directions or you can jump to a slide show.

You can add bookmarks and notes with in the book, that are searchable. There are pop up definitions throughout the book.
Visually this book is incredible. Some ebooks look photocopied – this is crisp and clear even when I zoomed in really, really closely to see just exactly what the needle is doing in a bind off.

I used this book on both my iPad and iPhone it worked equally well on both. I hope this is what the face of craft ebook publishing looks like.
Inkling also has a few more craft ebooks by Storey Publishing available — check ’em out!

Don’t Waste Food

It’s January, and many are struggling to keep their New Year's resolutions. Well, if saving money and lowering your food costs was on your list, author Sherri Brooks Vinton has a few tips to keep you on track.

Sherri, Storey’s preserving authority, has two great books that every gardener and home cook should have in their kitchens, Put ’em Up! and Put ’em Up Fruit! (March 2013). Her motto:

Put ’em Up!, Use ’em Up!

News channel CNN.com and Health.com also caught wind of Sherri’s expertise — they sought her out for an interview on eliminating food waste. The resulting article, How to Stop Wasting Food, is a great read and jam-packed with tips for every home kitchen.

More from Sherri:


Coming soon: Put ’em Up Fruit! 

To get more great ideas from Sherri, visit her website.

Friday, January 11, 2013

Recipes to Warm You Up, Comfort You, and Make You Swoon

Dishing Up® Washington author, Jess Thomson, has recipes that will warm you up, comfort you, and make you swoon.

King5.com out of Seattle, Washington invited Jess to New Day Northwest for an interview and cooking demonstration — the results are delicious!


New Day Northwest followed up by posting the recipes featured in the interview:
Get more from Jess on her blog, Hogwash.

Wednesday, January 9, 2013

Amy Cotler: The Saturday Market

Everything I love and hate about the local food movement is rolled into this Saturday market here in San Miguel, Mexico.
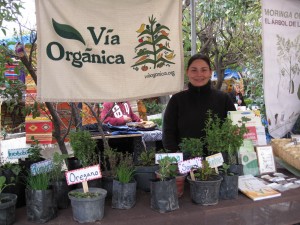
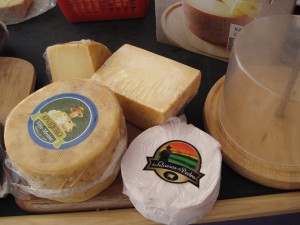
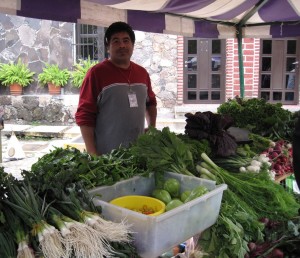
Joy — an organic market!  When I first came to this town, 30 years ago, most of the food vendors where not producers, but middlemen, just as they used to be back home. So I love witnessing farmers and artisan food producers hawking their own foods proudly, including distinctive cheeses, tequila, breads and vibrant greens.
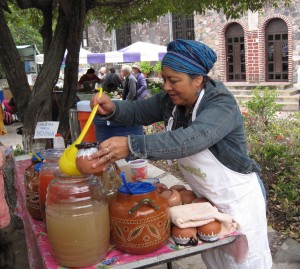
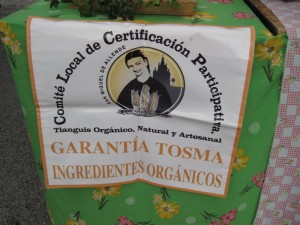
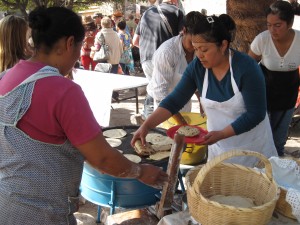
Fresh gorditas bake on a griddle with a selection of organic fillings to choose from. In fact, everything here is organic, and that’s a comfort in a region plagued by major water issues and agricultural run off. (And where I spotted bright green pesticide laden water running into a nearby lake and mono-crop rules supreme.)
But what I hate, and hate is too strong a word, the market’s location, tucked into the corner of a giant upscale Rosewood complex, a refuge for the super rich.
More importantly, why are few, if any, locals shopping here?  The market’s patrons are mostly gringos like me. And while we’re lucky to be here, deep into winter, buying organic Swiss chard and fresh cheese, I can’t help but feel sad that in a country so poor — any country, really —  more of this clean, fresh food doesn’t reach locals.
But, I know that movements start slowly, often trickling down. And that when I buy from these culinary entrepeneurs I’m supporting the local economy and a happier landscape. Besides, like it or not, fashion is an important component of many trends, luring folks to better ideas.
Besides, here and back home, where the local food movement is accused of the same elitism,  I’m more cheerleader than crank, advocating for fresh local  foods everywhere I go.
So I’ll return to my shopping and savor my spunky arugula, carrots that taste like, well…Mexican carrots taste very carroty. And I’ll remember that by supporting these hardworking farmers and food producers, we foster a movement here that is likely to grow. And that the land these farmers work is healthy land — farmland Mexico needs. And I hope that one day school children will be eating the food it producers, along with gringos, of course, like me.

Reposted from Amy Cotler: The Locavore Way

Tuesday, January 8, 2013

Why Grow That When You Can Grow This? — Pinterest Contest

Our friends at Timber Press are celebrating the release of their new book Why Grow That When You Can Grow This? with a Pinterest contest! The winner will receive a copy of this new book and a $50 gift certificate to a local nursery of their choice.


Why Grow That When You Can Grow This? offers hundreds of all-star alternatives that replace — and often outshine — popular problem plants.

Garden designer Andrew Keys makes it easier than ever to skip over the fussy plant prima donnas and move toward the equally gorgeous understudies. Each profile shows the problem plant and offers three alternatives that include three or more of the original plant’s characteristics — hardiness, shape, color, texture, light, and size.

To enter to win:
  • Make sure to follow both Andrew Keys and Timber Press on Pinterest. 
  • Create a new board on Pinterest and title it “All-Star Plants.” 
  • Pin at least 10 of your favorite plants that work the best for your garden. 
  • Post a link to your board in the comments section of our contest pin. 
  • Pin and share your board by Friday, January 11th, 2013. 
  • Andrew will choose a winner based on the best selection of all-star plants. 
  • Good luck!
*Fine print: No purchase necessary. A winner will be chosen based on plant selections. Open to residents of the U.S. and Canada, 18 years or older, as of 1/7/2013. Entries must be received by 5 p.m. Pacific Time on 1/11/2013. Void where prohibited.
________________________________________________

Media Surrounding the Book:
Why Grow That When You Can Grow This? and Andrew Keys were also the catalyst for a discussion for the Garden Designers Roundtable in November which hit 11 garden design blogs with mentions of the book. And, two reviews hit About.com yesterday, one from Kerry Michaels and one from Marie Iannotti who says, “The real enjoyment here is that Keys delivers on his promise to help us upgrade our gardens, make sense of our options and discover some surprisingly marvelous, new plants.”
Why Grow That When You Can Grow This? November Blog Tour:
Blue Planet Garden Blog
Toronto Gardens
Harmony in the Garden
Digging
Red, White & Grew
A Garden of Possibilities
A Charlotte Garden
Our Little Acre
Danger Garden
North Coast Gardening
Red Dirt Ramblings
Stay tuned for more great updates for Why Grow That When You Can Grow This? in 2013 including features in Horticulture and Martha Stewart Living!

Friday, January 4, 2013

Be Part of the Whole — Embrace All Living Creatures

On New Year’s Day my yoga instructor ended our class with a wonderful quote by Albert Einstein:
A human being is a part of the whole, called by us the “Universe,” a part limited in time and space. He experiences himself, his thoughts and feelings as something separated from the rest, a kind of optical delusion of his consciousness. This delusion is a kind of prison for us, restricting us to our personal desires and to affection for a few persons nearest to us. Our task must be to free ourselves from this prison by widening our circle of compassion to embrace all living creatures and the whole of nature in its beauty.
— quoted in Mathematical Circles Adieu (Howard W. Eves, Boston 1977)

The advice that Einstein gives in the last sentence, if followed by all humankind, could, quite possibly, deliver us peace on Earth.

This quote reminded me how blessed I am to be surrounded by my colleagues at Storey, who already live their lives with this “task” in mind, and how our work and publishing program encourages others to do so as well.

Wishing you, and those far and near to you, a year of giving, a year of prosperity, a year of peace, and a year of happiness.

— Kristy L. Rustay, Digital Production Manager, Storey Publishing

Show Me a Story: Crafting and Storytelling Events for the Family — Chicago Area

Story Disk Workshop at
Magic Tree Bookstore
Saturday, January 5  •  2:00PM
141 N. Oak Park Ave, Oak Park, IL

Memory Card Workshop at
Chicago Children's Museum
Sunday, January 6  •  Noon - 4:00PM
Navy Pier, Chicago, IL

Join Emily K. Neuburger for a special program on Sunday, January 6, from noon to 4pm. Emily will lead families in crafting memory cards, a project from her new book, Show Me a Story. This program is FREE with admission to the museum. Suggested age range: 5 & up.

Emily K. Neuburger is a teacher and imaginative crafter, and the author of Show Me a Story. She writes about creative living and unexpected treasures on her blog, Red Bird Crafts. She lives in western Massachusetts with her husband and two daughters. 

Thursday, January 3, 2013

Andrea Chesman: Italian Wedding Soup

My cooking tends to the one-dish supper — it’s easy to fix and clean up, it satisfies, and it enables me to plan around a specific vegetable without too much fuss. But in my writing I haven’t been giving enough love to Mom’s Best One-Dish Suppers, a book I wrote in 2005. Why not? I think because this type of cooking is so deeply ingrained that I rarely refer to a recipe and rarely think to write about it.


It’s soup weather now (as I write, we are deep in a blizzard), and I’ve been thinking about Italian Wedding Soup for a while. Greens and soup — particularly this combination of greens and meatballs in a clear broth — make a marriage made in heaven. Hence, minestra maritata has been translated as “Italian wedding soup,” though it was not necessarily served at wedding celebrations in Italy, where this particular combination was developed.

Greens and meatballs — a marriage made in heaven

I was at the Middlebury Natural Foods Co-op the other day and saw some gorgeous heads of escarole — and I knew it is time to make that family favorite. Escarole is in the chicory family, along with curly endive (frisรฉe), Belgian endive, and radicchio. Much less bitter than other chicories, its taste is quite similar to radicchio. You might also note it is less beautiful than radicchio and definitely less expensive to buy.

Escarole

Traditionally, the leafy chicories, such as curly endive and escarole, are grown under covers to deprive the heads of sunlight, resulting in a paler, less bitter head. I think that custom is falling away, but I don’t mind; I like my greens bitter.

Gently boiling and stirring the Italian Wedding Soup

The escarole in this soup can be replaced with mustard greens, turnip greens, kale, chard, spinach, or cabbage, so feel free to substitute. The meat can be the more traditional ground pork or half ground pork and half ground beef.

Ingredients
12 cups chicken broth (homemade is best)
1 pound ground turkey
2 eggs
1 cup fresh bread crumbs
1/2 cup freshly grated Parmesan cheese
2 garlic cloves, minced
Salt and freshly ground black pepper
1/3 to 1/2 cup pastina or orzo (small pasta shapes)
1 1/2 pounds greens, chopped

Directions
  1. Bring the chicken broth to a simmer.
  2. To make the meatballs, combine the ground turkey, eggs, bread crumbs, Parmesan, garlic, 1 teaspoon salt, and 1/2 teaspoon pepper in a food processor. Process until well mixed. Alternatively, mix by hand in a large bowl. Form the meat mixture into 1/2-inch meatballs (the size of marbles), and add to the simmering soup. Simmer until the meatballs are cooked through, about 30 minutes.
  3. Increase the heat slightly, add the pasta, and boil gently until the pasta is cooked, about 10 minutes.
  4. Add the greens, and continue to boil gently until the greens are tender, 3 to 10 more minutes, depending on the type of greens. Taste, and adjust the seasoning. Remove from the heat, and serve.
A hot bowl of homemade Italian Wedding Soup — enjoy!

Adapted from Mom’s Best One-Dish Suppers. @2005 Andrea Chesman. All rights reserved.

Visit Andrea’s website

LinkWithin