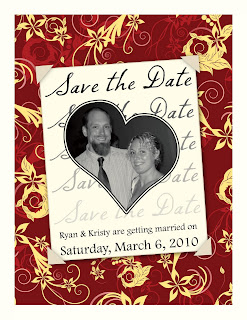
 This is the save-the-date card. I bought a roll of self-adhesive magnet strips and stuck them to the back. Most everyone I have talked with really liked the magnet feature.
 I have been saving wine bottles for some time now — long before I was engaged. My father makes his own red wine, and I had planned to pass along the bottles to him. Sorry, Dad — now I'm using them for the wedding!
The centerpieces for my wedding are going to be three cylinders of varying heights (the bottom of the wine bottles), each filled halfway with water and a floating candle. They will be adorned with heather (an evergreen branching shrub), and the white heather will also be carried through in the floral bouquets for our wedding. To my delight, I learned after I chose the flower that heather is the second most recognizable floral symbol of Scotland! Both Ryan (my fiancé) and I come from Scottish heritage. Ryan's grandmother was born there, and she has instilled her love of her native country into Ryan — so much so that he and his groomsmen will be wearing kilts for our ceremony.
I found the process of cutting the tops off wine bottles to be an interesting procedure. The glass cutter I bought online for this project doesn't exactly cut the glass; instead, it etches the glass. The device is really just a circular blade attached to a base with rollers. The rollers allow you to spin your bottle in order to etch an even circle around the circumference of the bottle. You can adjust the base to get the varying heights.
The process is as follows: Place your bottle on the rollers, and etch your cut line. Then rotate the bottle over the flame of a candle, centering the etched line over the flame. Rotate four to five times, then take an ice cube and rub the cube against the bottle along the heated etched line. After you've gone around the line three to four times with the ice cube, twist with a slight amount of pressure to separate the top of the bottle from the bottom (if nothing happens, don't force it) — the hot/then cold process should sever the bottle where you etched it. Sometimes this works on the first try, and sometimes you will need to repeat the heating and cooling steps. (This process felt so Mr. Wizard!) Once you have removed the top of the wine bottle (which you can save for other crafty uses), you should sand and grind the edge so it's smooth.
Mine is a two-hundred-person wedding. I estimated 25 tables, and 3 wine-bottle candles per table. Consequently, I need 75 total, and only 10 are finished! I have my work cut out for me.
I must be a glutton for punishment, because once I'm finished with those, I have more DIY wedding ideas lined up. My next plan is to come up with some way of using the wine corks as the place card holders. I found a few ideas online, but they weren't exactly what I was thinking. I will keep you posted when I come up with something good!
Recycle, reuse, reduce!
Kristy L. MacWilliams, Marketing Manager
2 comments:
Sounds like you have some great ideas Kristy.... good luck with it all! - El
Very creative...I am impressed and also very very happy for you both...Luv you!!!
Dee
Post a Comment